

Collect donations at the counter (POS)
Run a fast donation desk with categories, quick amounts, a live desk feed and a dynamic UPI QR — online or offline.
- 1
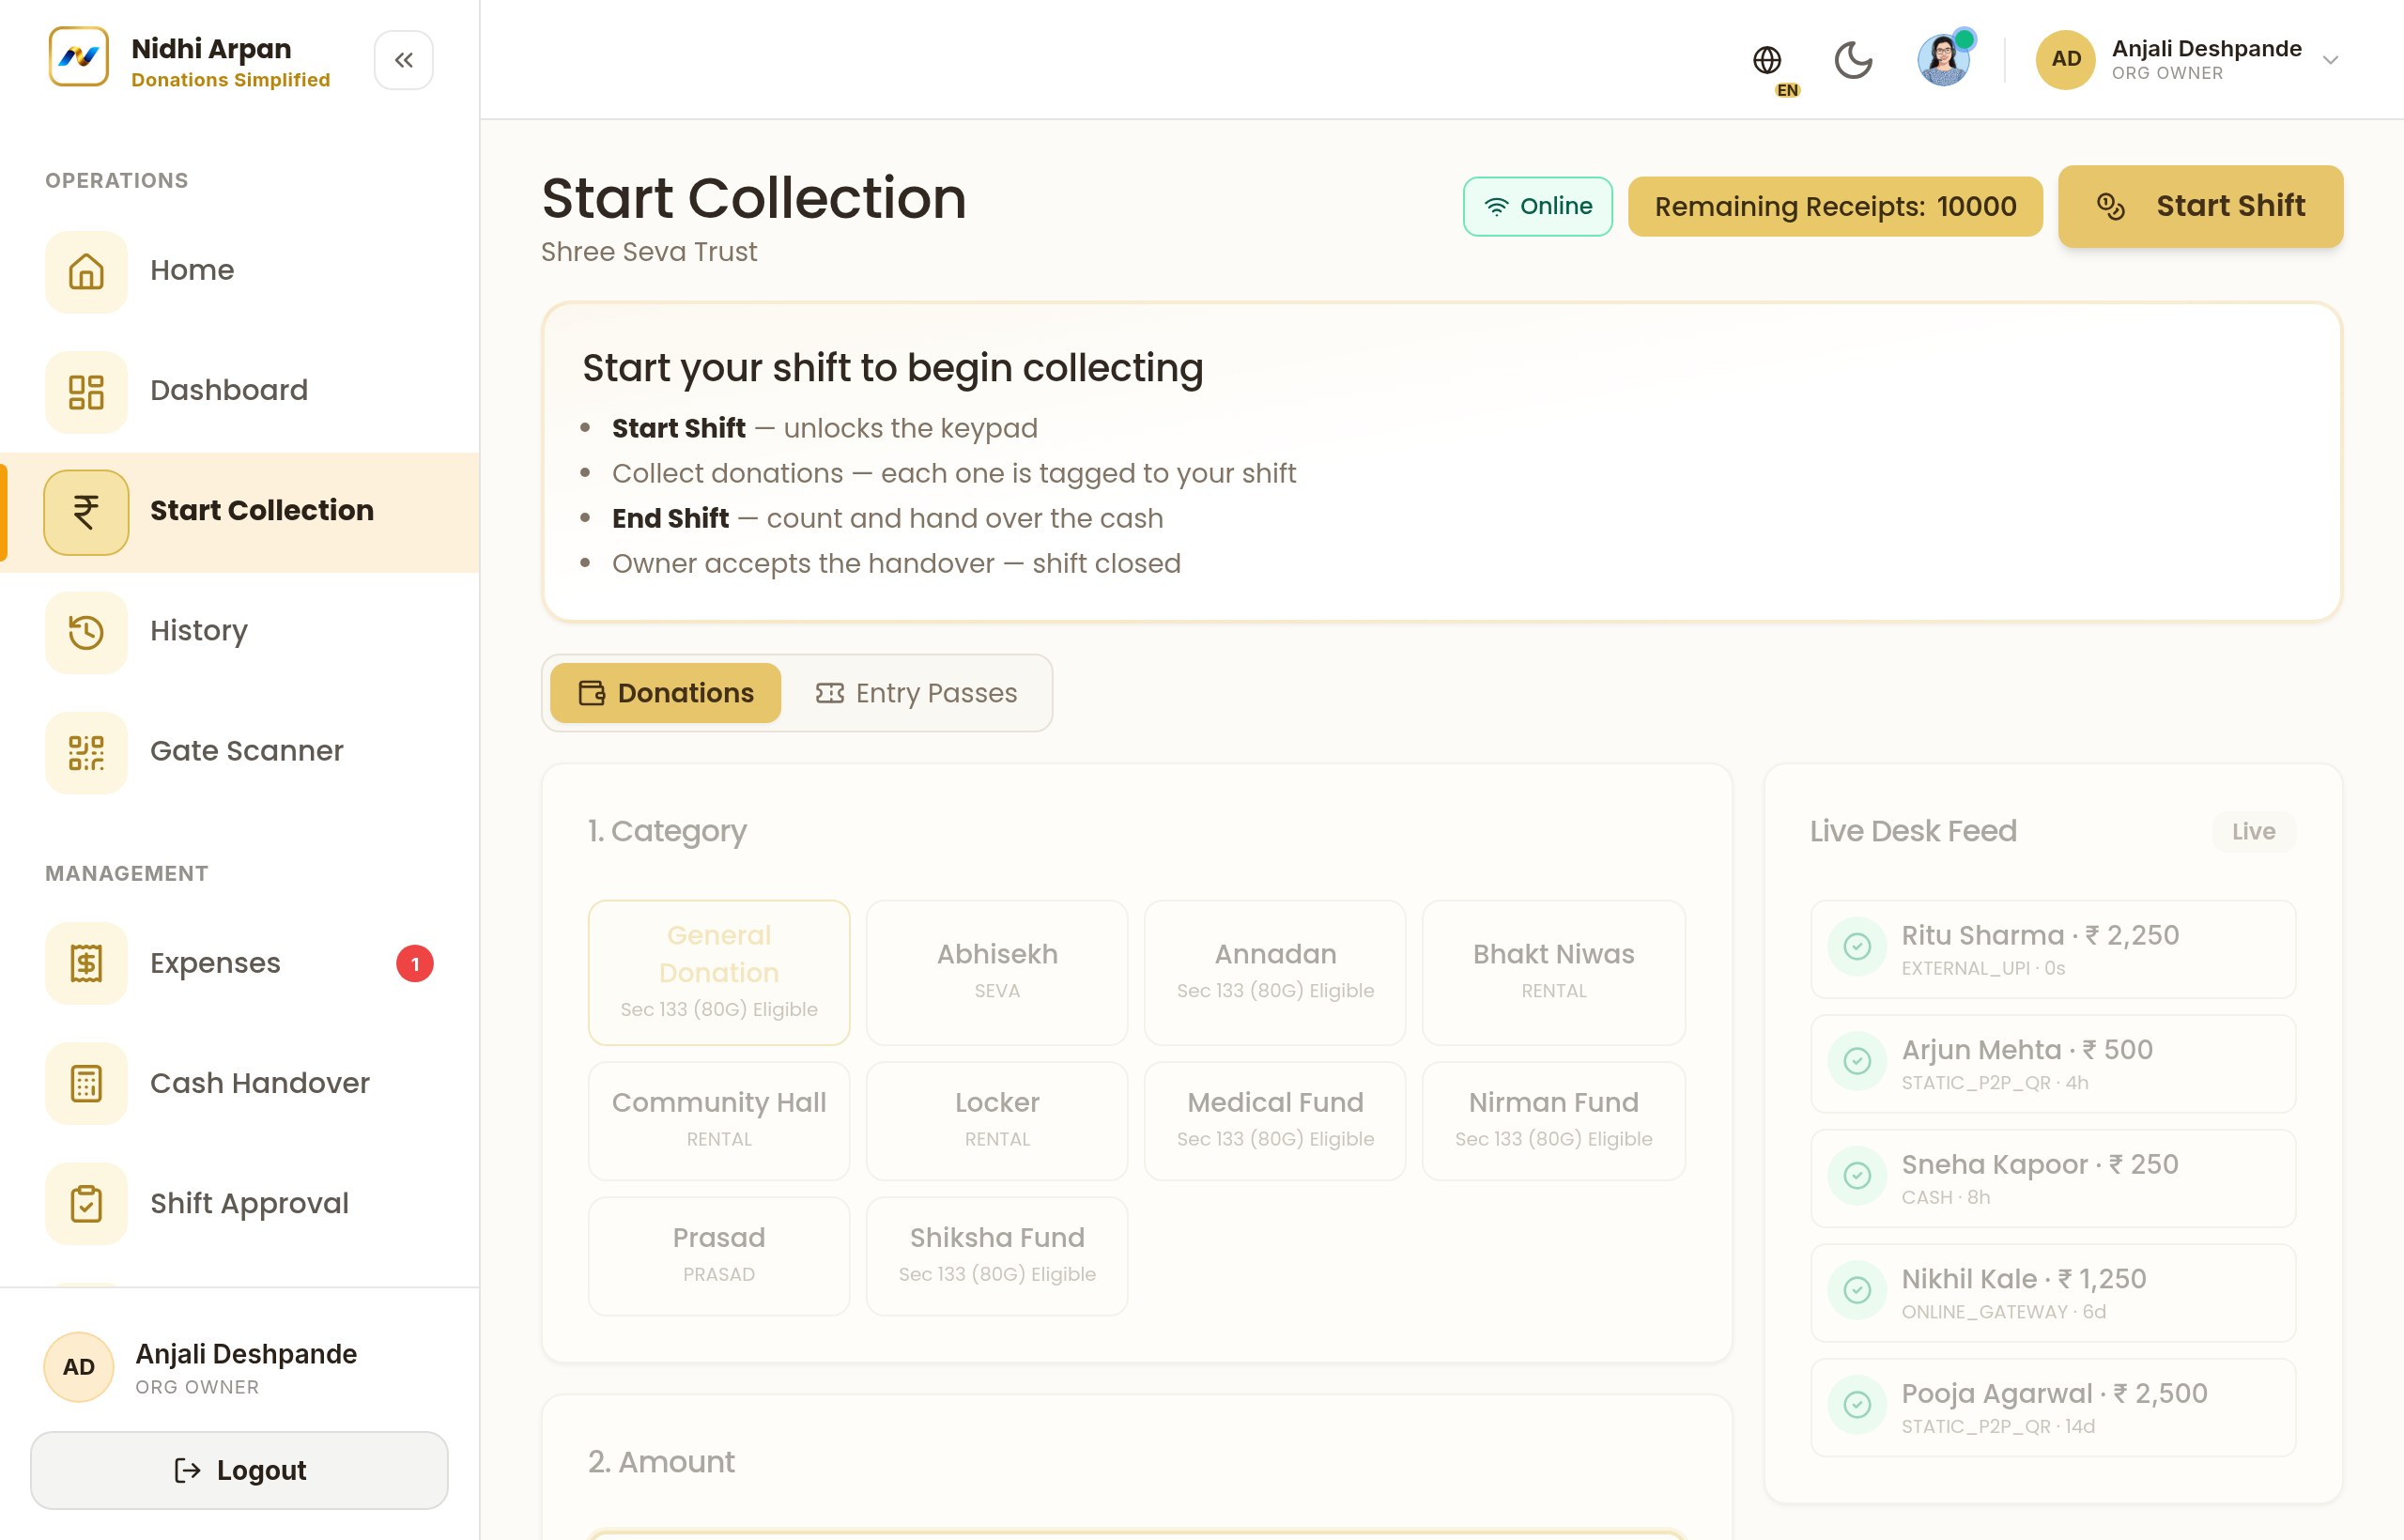
Open the collection desk
Head to the POS / Start Collection screen. Pick a category, tap a quick-amount or type a custom figure, and capture the donor details. Every entry appears instantly in the live desk feed.
Counter POS with categories & quick amounts - 2
Choose a payment mode
Select how the devotee is paying — the modes shown depend on your plan: Cash, UPI / QR and External UPI, plus (for registered orgs) a dynamic Razorpay QR, Card machine or Cheque. Tap any one and a short tip explains exactly how to collect and confirm it. For UPI / QR the devotee scans and pays the exact amount and you visually confirm success before pressing Proceed; a watermark-free QR renders instantly and cash is fully supported too.
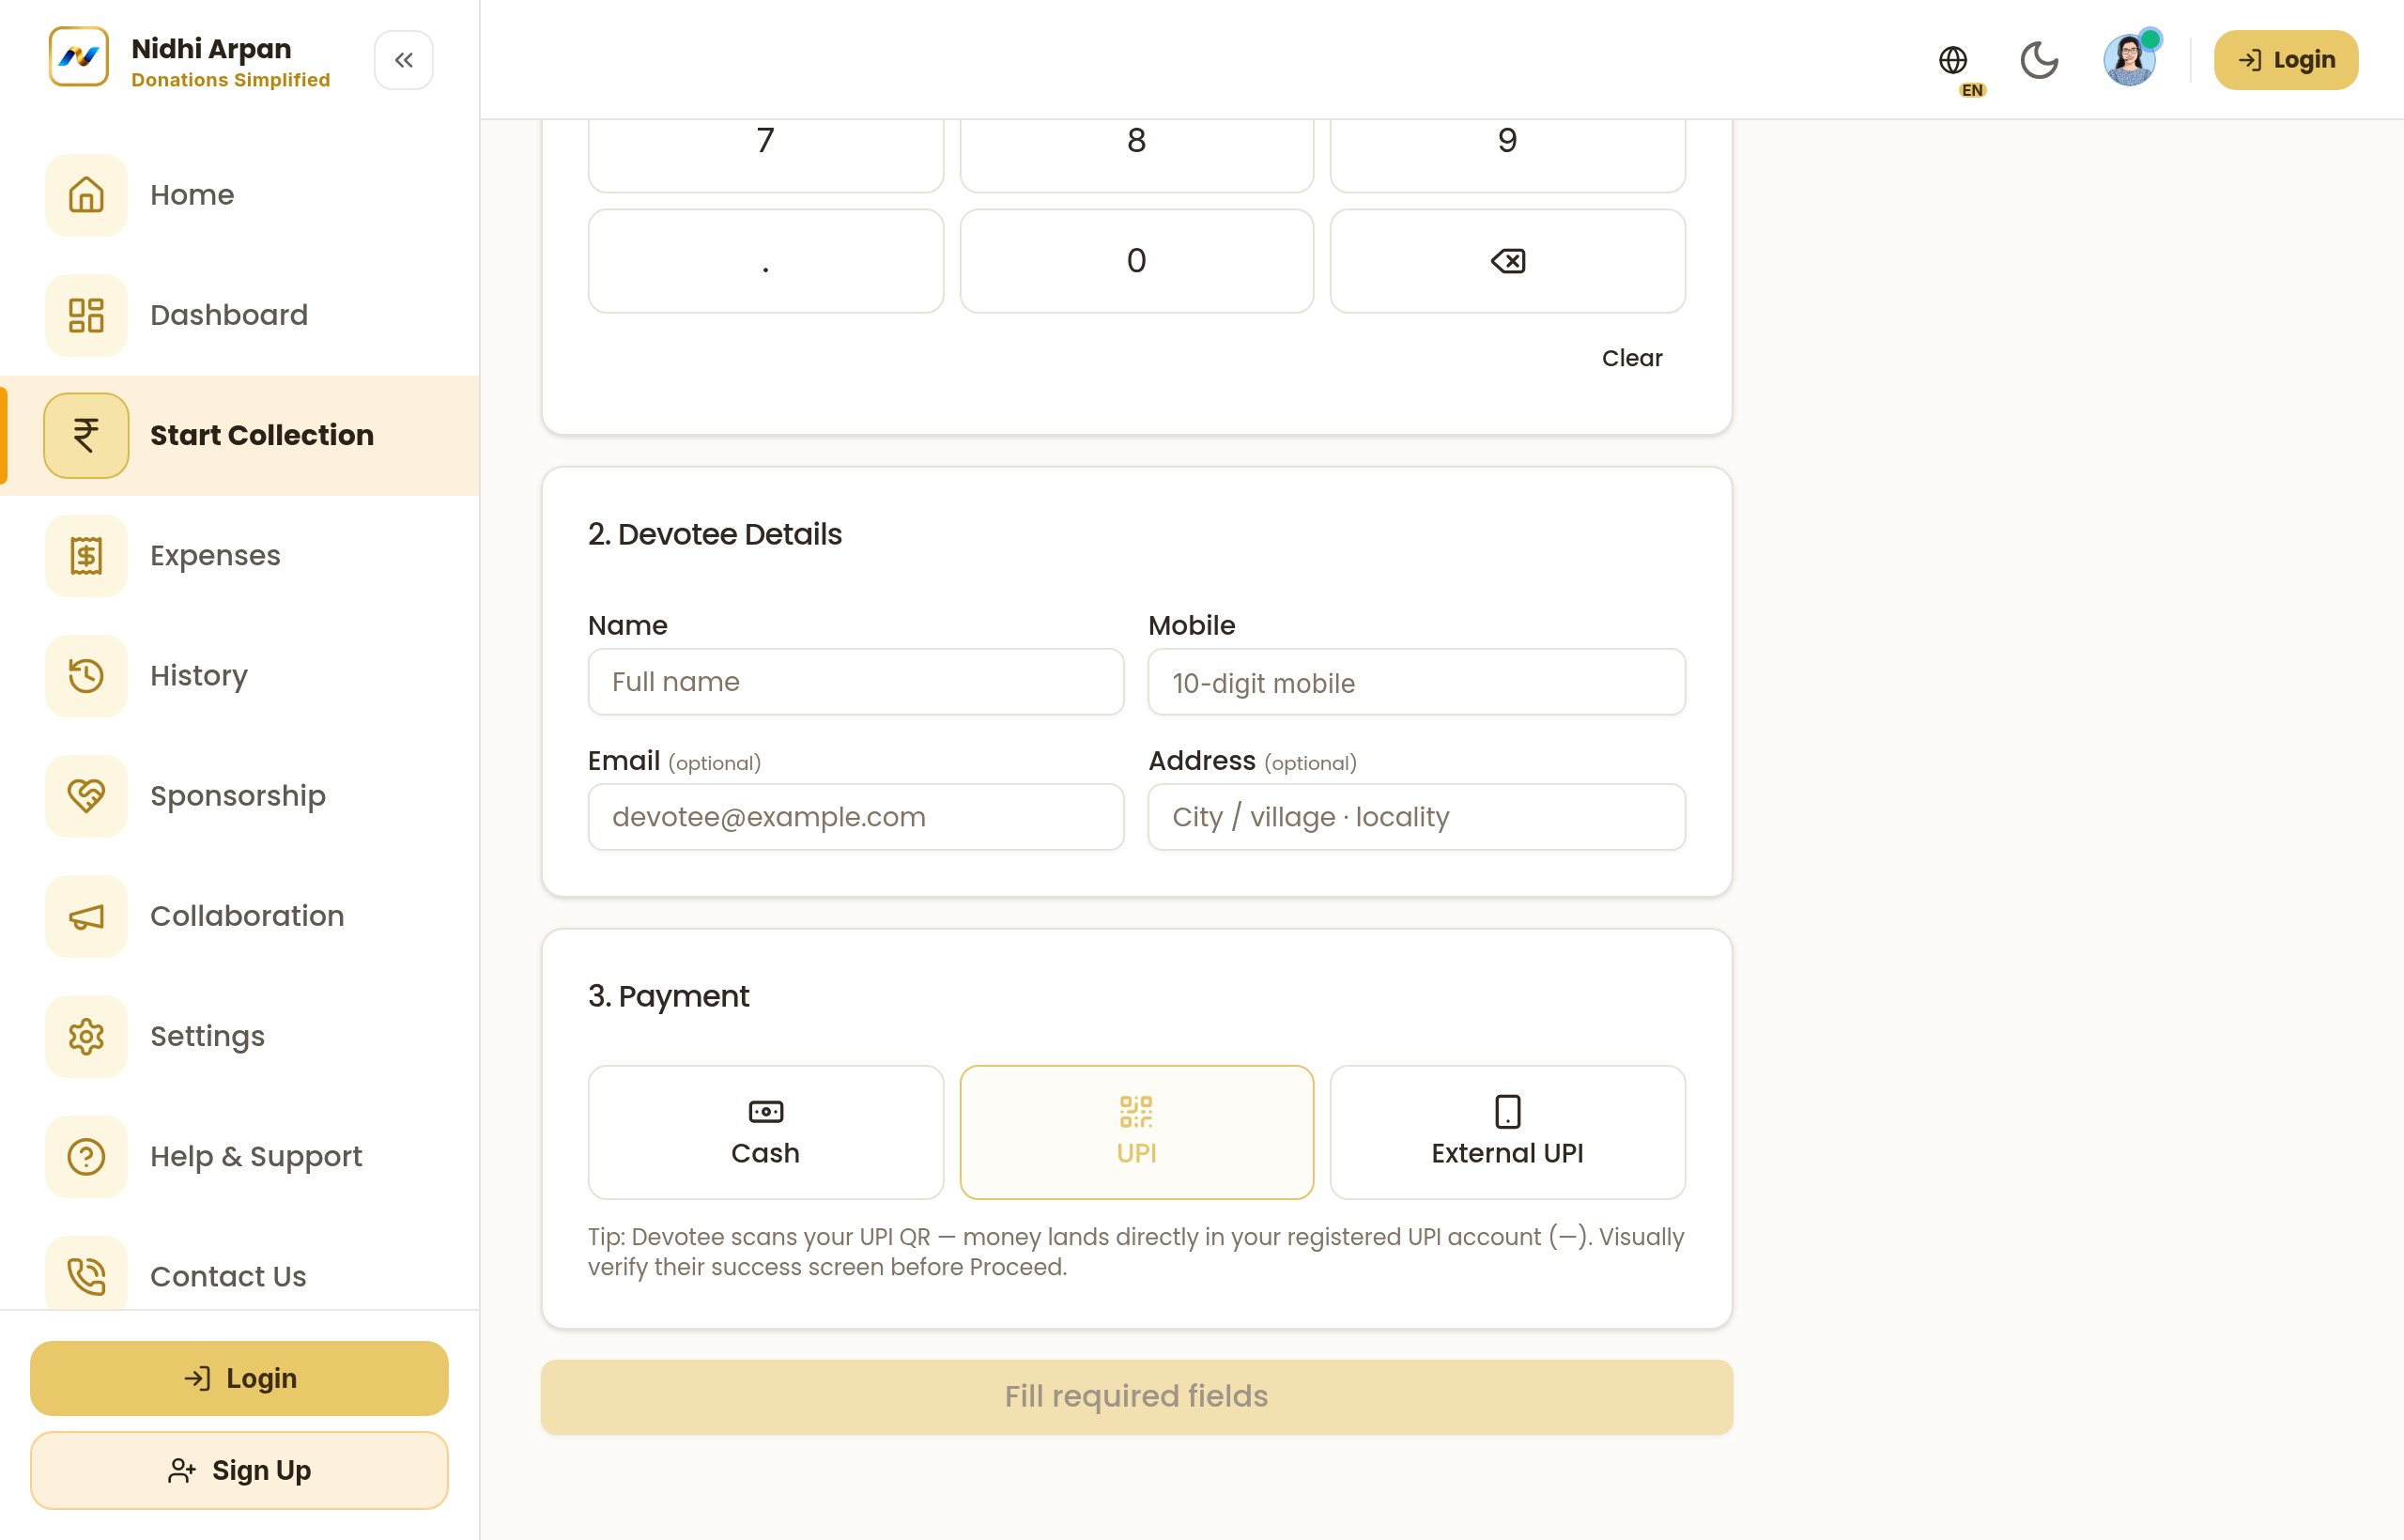
Select from the available payment modes - 3
Close the shift with a cash count
At the end of each shift do a blind denomination count. The system compares expected vs counted so any variance is caught the same day — not in March.
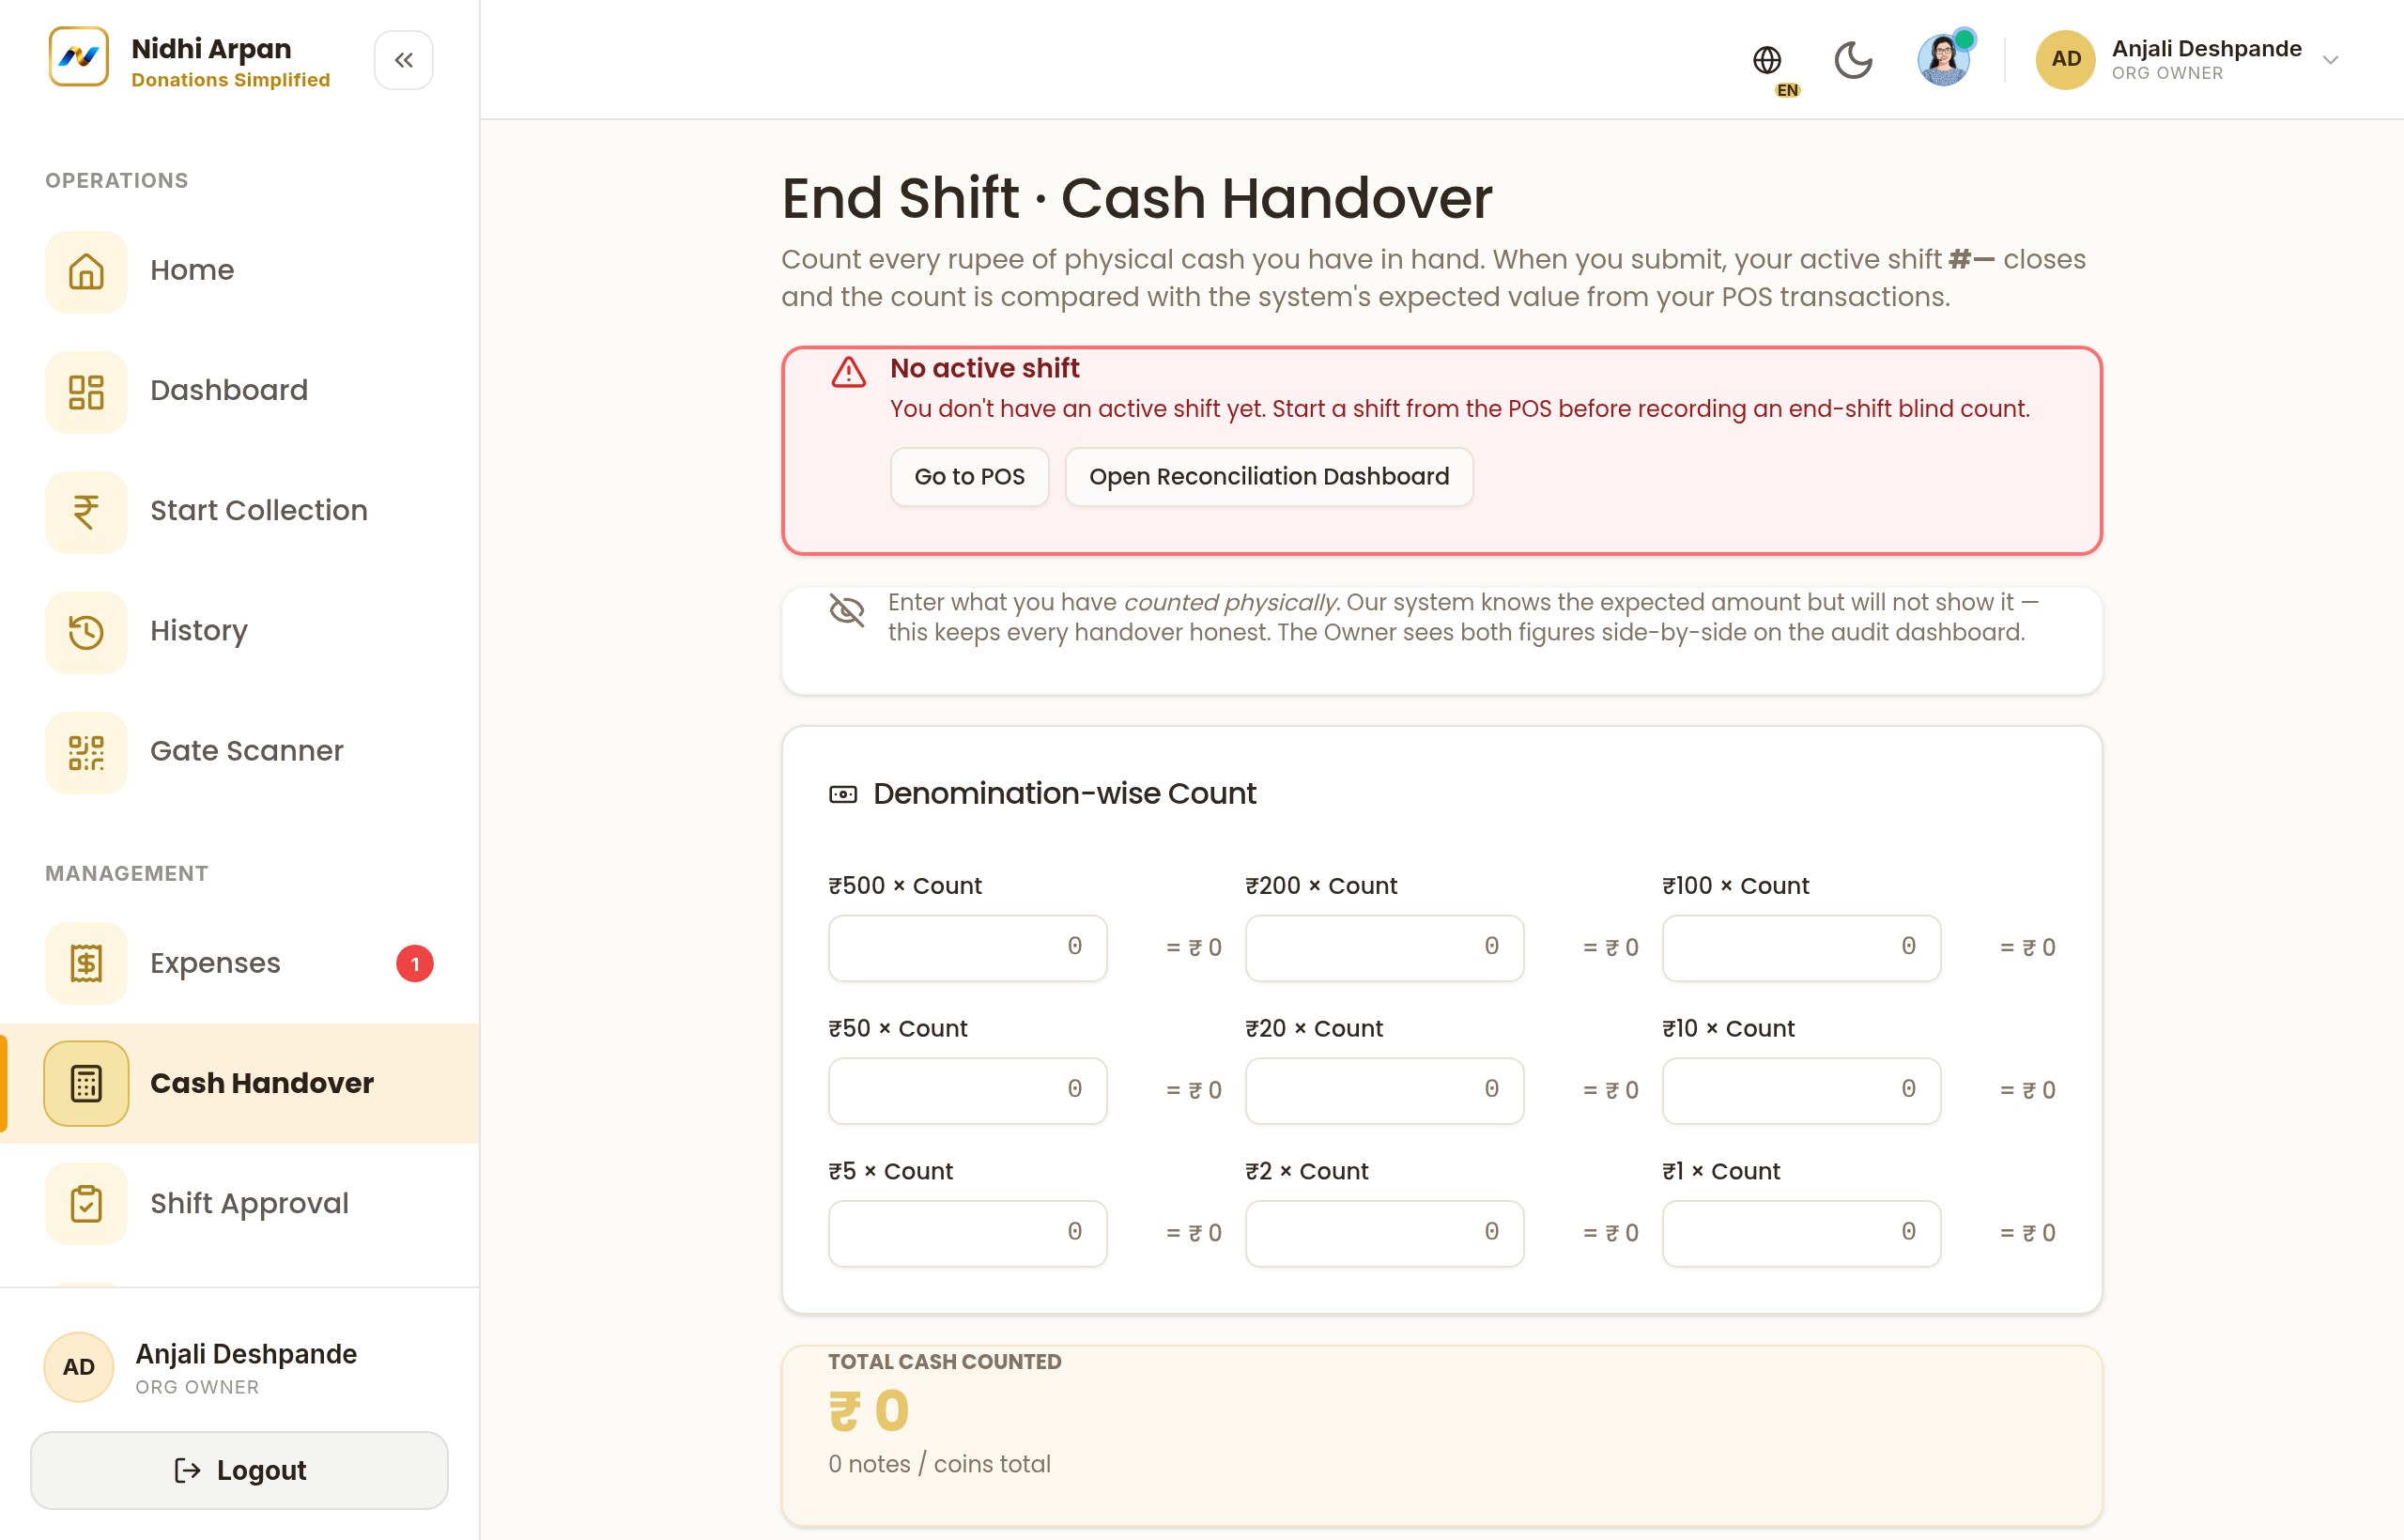
Blind cash reconciliation at shift end
That's it! Need more detail? Check the FAQ or contact our team.